
Page 106 - International Artist 110
P. 106
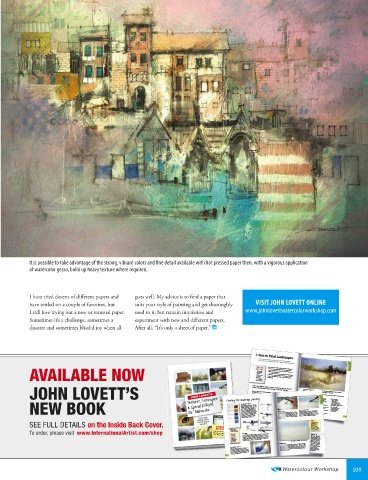
surface texture. It is more suited to a
        broad, loose approach and not good for
          fine detail. Rough paper accepts big, wet
        washes well and doesn’t bloom (create
        those cauliflower-shaped blotches) like hot
        pressed paper tends to.
         Hot pressed paper is great for intricate
        detail and, because of the flat surface, gives
        more brilliance to colors. Big, flat, even
        washes are more difficult to achieve on hot
        pressed paper as it usually has more surface
        sizing than the heavier textured papers.
         Cold pressed paper doesn’t have the
        texture of rough, so it doesn’t granulate
        as much, but is better for detail while still
        having a little texture.
                                  Rough paper has a heavy texture and is suitable for fractured, textured subjects without too much  fine detail.
        Weight
        Most manufacturers make their papers in
        a number of different weights from thin,   dimensions can vary slightly between   The most common weights
        lightweight papers suitable for sketching   manufacturers due to variations in the rate   for full sheets are:
        up to heavy cardboard like papers that   of shrinkage as the paper dries. Full sheets   •  90-lb or 185-gsm
        require no stretching or preparation before   can be cut into smaller standard sizes:   Good for sketching, too thin for painting
        painting.                 ½ sheets (15 by 22 inches or 38 by 55   •  140-lb or 300-gsm
         In the U.S., paper weight is designated   centimeters) and ¼ sheets (11 by 15 inches   Good for painting, most popular weight
        in pounds. 140-pound paper means a   or 27½ by 38 centimeters).  •  280-lb or 600-gsm
        ream (500 sheets) of that paper weighs   Larger sheets, such as the “double   Good for painting, needs no stretching, expensive
        140 pounds. In Europe, paper is classifi ed   elephant” (29 by 41 inches or 74 by 104
        according to its weight in grams per square   centimeters), are available as are rolls of
        meter (gsm).              paper up to 10 meters long and 1.2 meters
         The most popular paper size is the   high. Most manufacturers offer their most
        Imperial full sheet, which measures 22 by   popular papers in sketchbooks and blocks
        30 inches, or 55 by 76 centimeters. These   of various sizes.


                                                                     Watercolour Workshop  103


   John Lovett_110.indd   103                                                     6/22/16   11:22 AM